How to record a sale.
updated 3 months ago
"Sales" typically refers to the revenue generated by a business through the selling of goods or services to customers. It represents the total amount of money earned by the business from its primary activities.
Recording a Sales Transaction on Simplebks: A Step-by-Step Guide
Step 1: Log in to your Simplebks account at https://app.simplebks.com/.
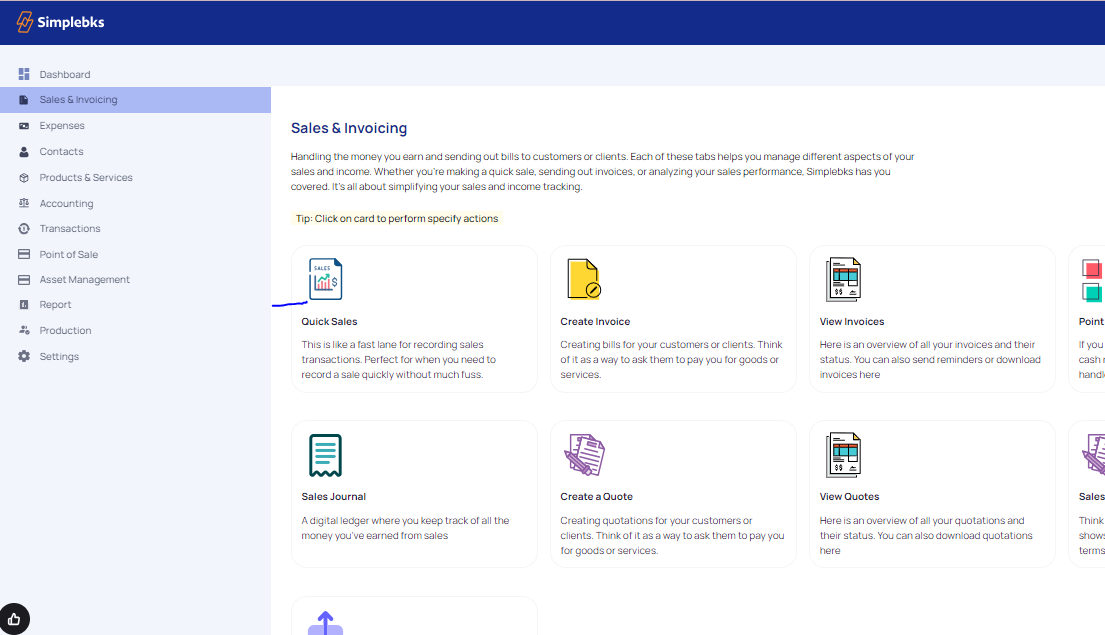
Step 2: Navigate to "Sales and Invoicing" and select "Quick Sales."
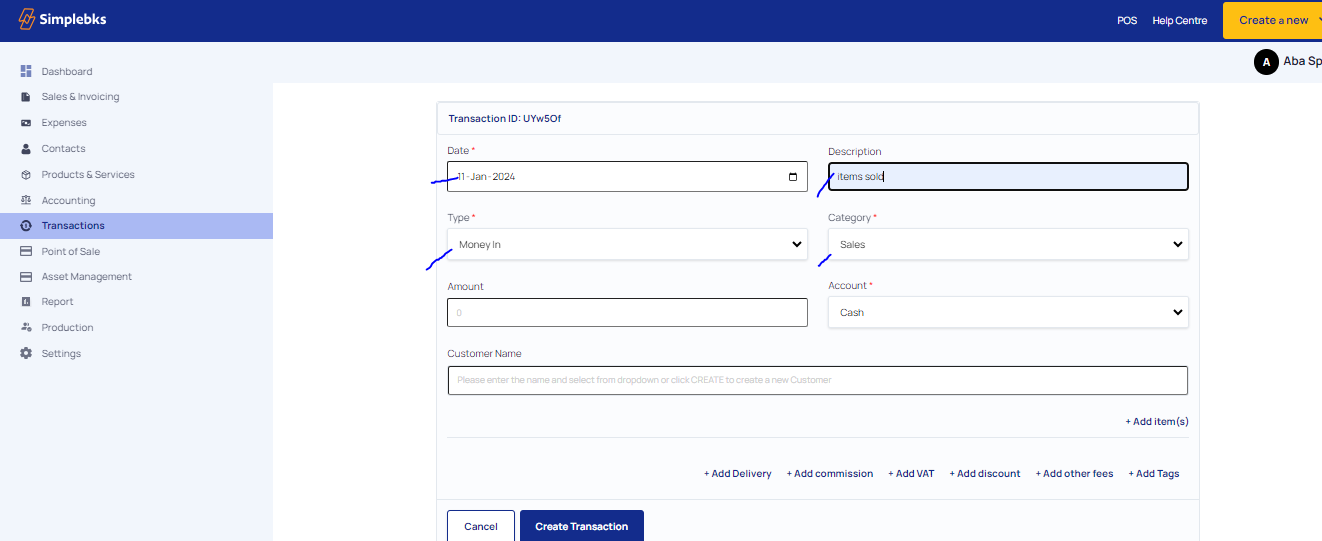
Step 3: Enter transaction details:
Date: Specify the date of the sale.
Description: Provide a brief description of the sale.
Type: Choose "Money In" to indicate revenue.
Category: Select "Sales" to categorize the transaction.
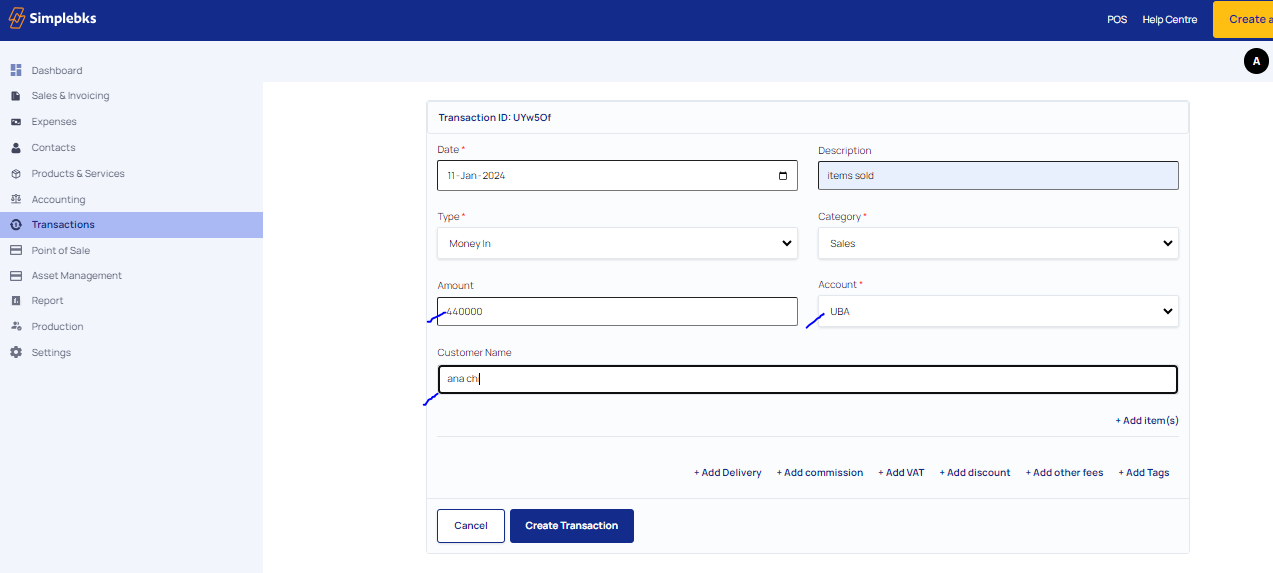
Step 4: Specify payment details:
Amount Paid: Enter the total amount received.
Account: Indicate whether the payment is in cash (cash given out) or through a bank (mention the specific bank, e.g., Ecobank).
Step 5: Provide customer information:
Enter Customer's Name: Click on "Create a New Customer" if not in the system.
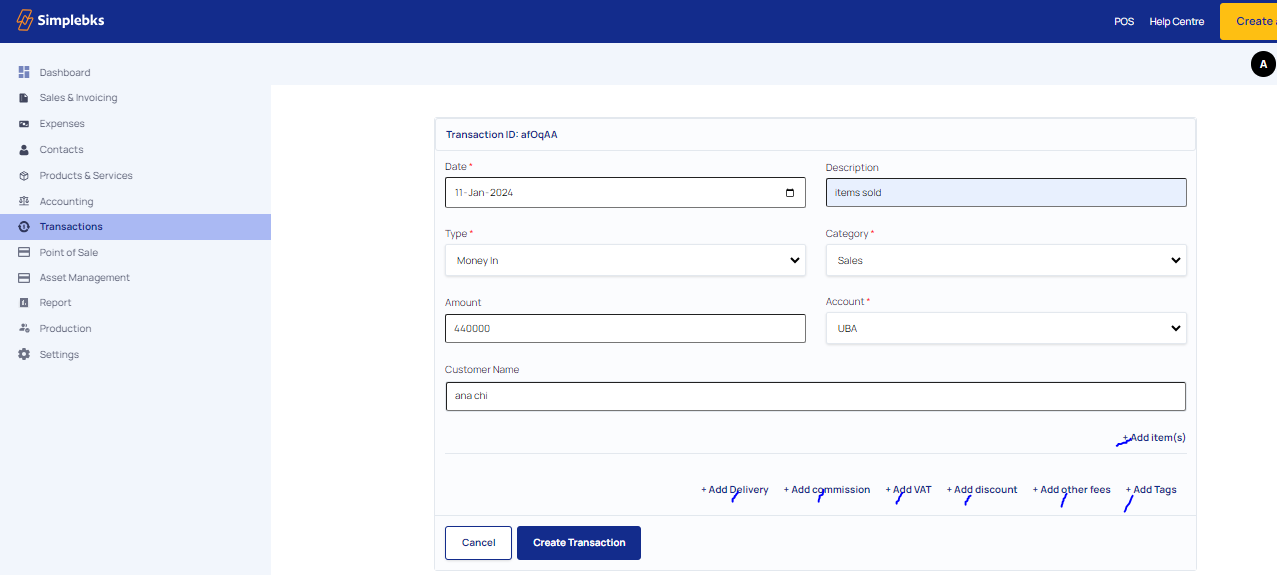
Step 6: Add items to the transaction:
Click on "Add Items" to include more products or services.
Step 7: Include additional details if applicable:
You can add information about delivery, commission, discount, other fees, and tags.
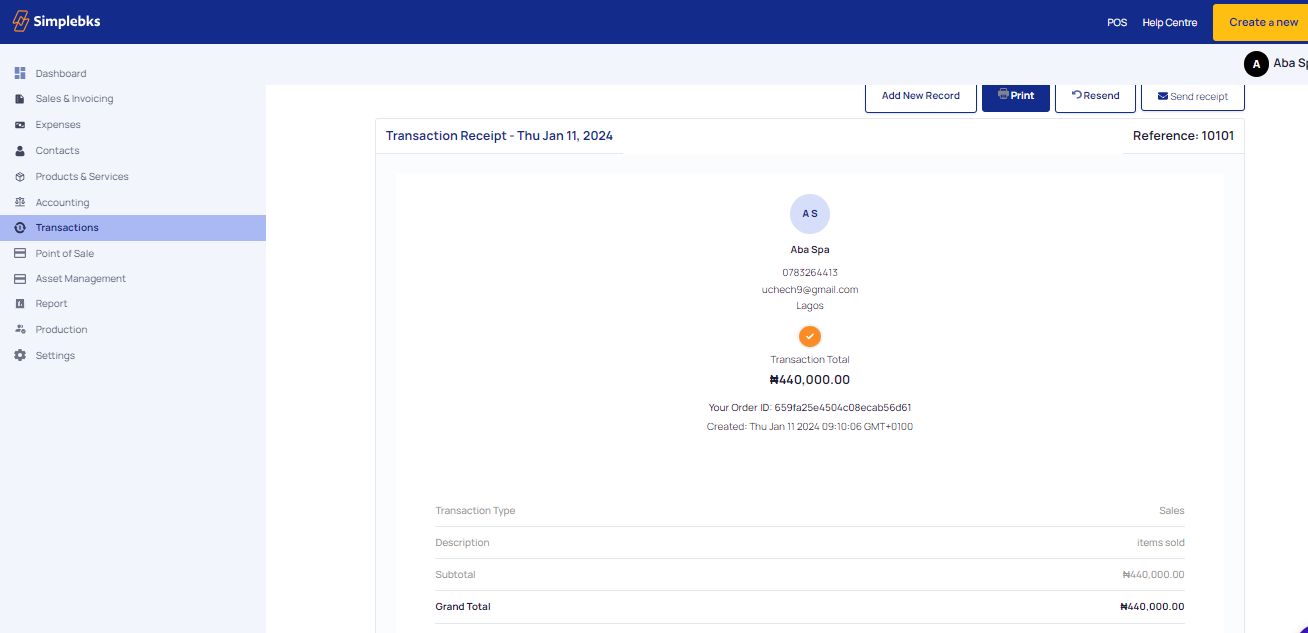
Step 9: Verify the transaction:
Receive confirmation that the transaction has been successfully recorded.

Step 10: Document the transaction:
Click on "Print" to obtain a physical copy or download the receipt as a PDF.
Step 11: Send the receipt to the customer if needed:
Click on "Share receipt" to forward the receipt to the customer.
Was this article helpful?